The Office 365 Options dialog is opened by clicking the Office 365 Options button in the Settings group of the Configuration ribbon on the main application window.
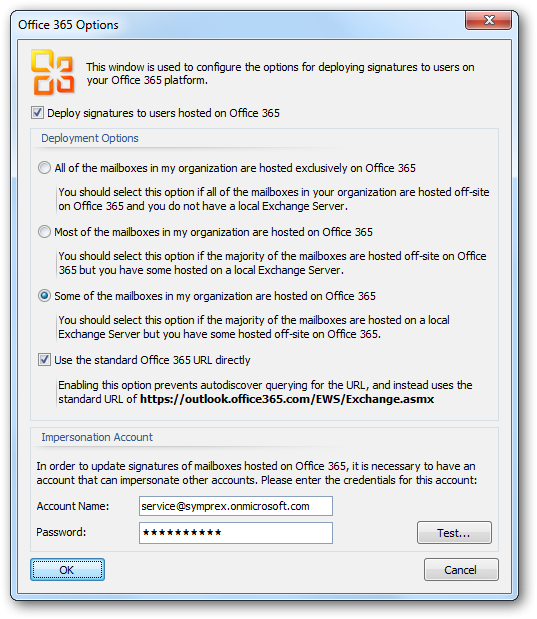
This window is used to configure deployment of signatures to your Office 365 platform. If you have users with their mailboxes hosted on Office 365, select the Deploy signatures to users hosted on Office 365 checkbox and then select the most appropriate option which describes your organization, which controls the autodiscover lookup:
| • | All of the mailboxes in my organization are hosted exclusively on Office 365; you should select this option when all of your users' mailboxes are hosted on Office 365 and you do not use a local Exchange Server. When this option is selected, Email Signature Manager will not attempt to query any local Exchange Servers in your local domain and will only deploy to the Office 365 servers. |
| • | Most of the mailboxes in my organization are hosted on Office 365; you should select this option when most of your users' mailboxes are hosted on Office 365 and only some are hosted on a local Exchange Server. When this option is selected, Email Signature Manager will first attempt to deploy signatures to your Office 365 platform and, if this fails, will then look for an internal Exchange Server on your local domain. |
| • | Some of the mailboxes in my organization are hosted on Office 365; you should select this option when some of your users' mailboxes are hosted on Office 365 but most are hosted on a local Exchange Server. When this option is selected, Email Signature Manager will first attempt to deploy signatures to an internal Exchange Server on your local domain and, if this fails, will deploy to your Office 365 platform. |
It is possible to bypass the autodiscover mechanism by enabling the Use the standard Office 365 URL directly option. When enabled, this will cause deployment to not autodiscover the URL for the Office 365 Exchange Web Services (EWS), and to use the standard Office 365 EWS URL directly.
Important: It is recommended that the Use the standard Office 365 URL directly option is only enabled if there is a specific requirement to do so; for example, if the autodiscover service is not working as expected.
In order for signatures to be deployed on your Office 365 platform, it is necessary to provide the credentials of an account that can impersonate your users. This account must be a member of a role group that has the roles ApplicationImpersonation and View-Only Recipients assigned, and can be configured as follows:
| 1. | Start a new remote Power Shell and connect to your Office 365 platform. |
| 2. | Type the following line, and then press ENTER: New-RoleGroup -Name "Symprex Office 365" -Roles "ApplicationImpersonation", "View-Only Recipients" -Members <Account> where <Account> is the name of the account to include as a member in the new role group. |
| 3. | You can enter the following command to show the role group configuration: Get-RoleGroup "Symprex Office 365" | fl |
| 4. | You can enter the following command to list the role group members: Get-RoleGroupMember "Symprex Office 365" |
For more information about role groups in Exchange Online, and how to work with role groups in the Exchange Control Panel rather than using PowerShell, please refer to http://help.outlook.com/en-us/140/ee441216.aspx.
Once the impersonation account has been configured, enter the full account name in the Account Name box and the password in the Password box.
Click the Test... button to open the Office 365 Connectivity Test dialog, which is used to test connectivity to the Microsoft Office 365 servers located on the Internet and the specified impersonation account.
When the settings have been configured as required, click the OK button save your changes and close the dialog. Alternatively, click the Cancel button to close the dialog without saving any changes.