This topic only applies when you use Email Signature Manager in direct database mode.
When using Email Signature Manager in direct database mode, the Email Signature Manager Agent connects directly to the database.
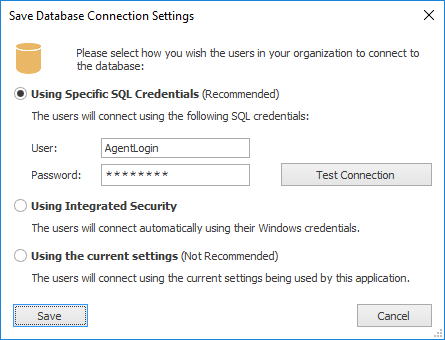
The Save Database Connection Settings dialog is used to save a configuration file that configures the Agent to connect directly to the database as well as the credentials to use. The database must be a SQL Server database. The dialog is opened by clicking the Save Configuration File button on the Advanced page of the Deployment Options dialog.

When saving the configuration file, you need to decide how the Agent will connect to the database and then select the appropriate option:
•Using Specific SQL Credentials: This is the recommended option. To use SQL Credentials, create a new SQL login following the instructions in this topic. and then enter the user name and password for that login. To verify you have entered the correct credentials, click the Test Connection button. Using this approach will mean that all instances of the Agent (whether on- or off-premises) will connect with the same login.
•Using Integrated Security: This approach can be used when all users logon to your Active Directory domain. You will need to create a SQL Login for the appropriate domain users and/or groups. The basic principle of how to do this is outlined in this topic, which describes how to create a login for use by a domain user when running the main application in Manager Only mode.
•Using the current settings: This approach is not recommended, because it will mean that the Agent will connect with the same login as the main application and that login will have been granted ownership rights on the Email Signature Manager database. However, this does provide a quick way to get the Agent working in direct database mode.
Once the appropriate option has been selected, click the Save button to save the configuration file; the file must be named agent.ini and should be saved in one of the following locations:
•If you are using GPO to deploy the Agent, save the file in the same folder as the MSI package; when it is installed, the package will automatically copy the file.
•If you are using a shared folder, save the file in the shared folder next to the SignAgent.exe executable.
Once the file has been saved, the dialog will be closed. To close the dialog without saving the file, click the Cancel button.