Campaigns are generally used to add news and marketing information to the end of the designated signatures; for example, to tell recipients of emails from your organization about a forthcoming promotion.
•To create a new campaign, click the Campaign button in the Create group in the Home ribbon on the main application window.
•To edit an existing campaign, you can either:
oSelect the campaign in the template browser on the main application window and click the Edit button in the Template group of the Home ribbon, or
oDouble-click the campaign in the template browser, or
oRight-click the campaign in the template browser and select Edit from the context menu.
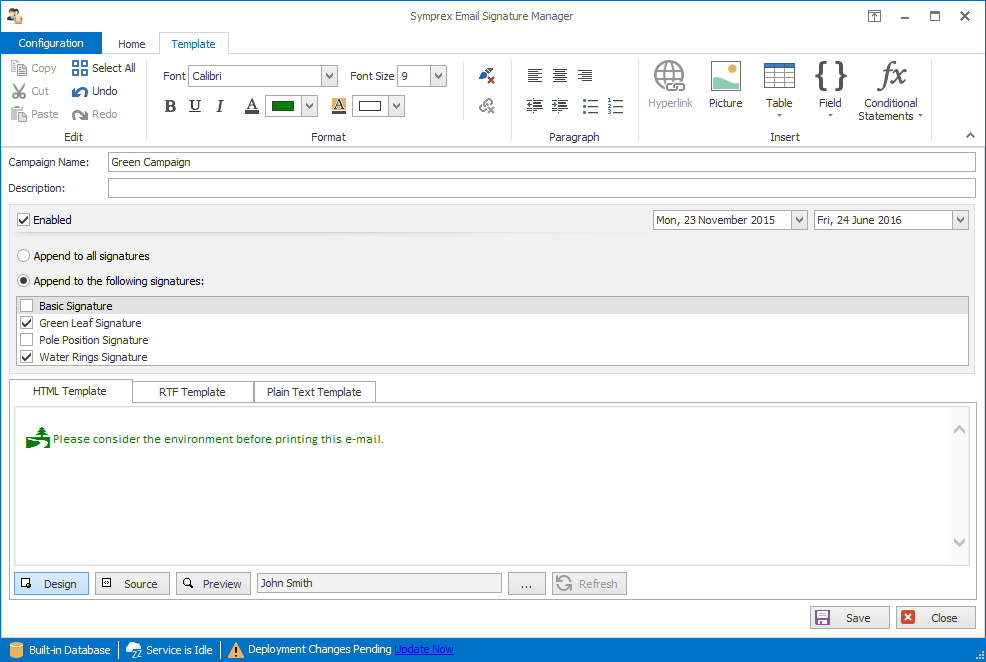
When you create or edit a campaign, the template editor will be opened:

Campaigns can have the following properties configured:
•Name: The unique name of the campaign (mandatory).
•Description: A description of the campaign.
•Enabled: Determines if the campaign is currently enabled. When enabled, the campaign is appended to the designated signatures.
•Start Date: Optionally specifies the date from which the campaign will be appended to the designated signatures.
•End Date: Optionally specifies the date until which the campaign will be appended to the designated signatures.
•Append to all signatures: When selected, specifies that the campaign is appended to all signatures.
•Append to the following signatures: When selected, the campaign is only appended to the signatures selected in the list.
Note The fields in the campaign will be merged using the data source from the parent signature at the point of deployment.
•To save the changes and continue editing the campaign, click the Save button.
•To close the editor and return to the template browser, click the Close button; you will be prompted to save if you have made any changes.