This topic will guide you through the basic process of creating a new Email Signature Manager database on an instance of Microsoft SQL Server.
If your organization already has a SQL Server available, ensure that the database is created following any established policy.
If your organization does not have SQL Server, please follow our guide for installing and configuring SQL Server Express.
Creating the Database
1.Download the script to create the database from the Symprex website:
https://www.symprex.com/support/files/esm/v7/sql/esmdb.zip
This zip file contains one file, esmdb.sql, which should be extracted to a known location.
2.Start SQL Server Management Studio and connect to the appropriate instance of SQL Server. Right-click Database and select New Database....
3.On the General page, enter a suitable name for the database. The database script uses EmailSignatureManager as the default name.
4.On the Options page, configure the appropriate settings for the database according to your organization's policy. If you are using SQL Server Express, the Recovery Model can be set to Simple and database backups taken manually (see the topic on installing and configuring SQL Server Express).
5.Select File > Open > File... (or press Control+O) and open the esmdb.sql script. If necessary, change the [USE] statement on the first line to point to the database created in step 3.
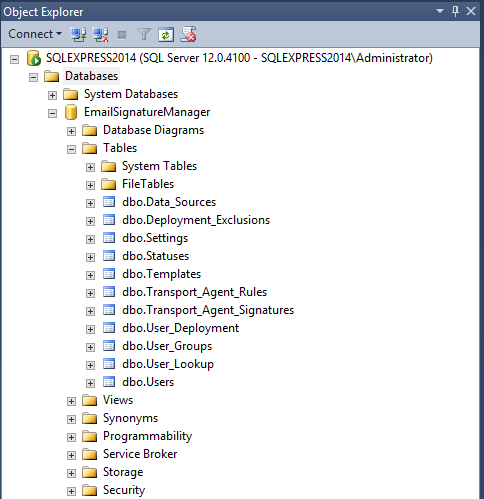
6.Execute the script (press F5), which will create the database structure. Verify that there are no error messages reported. To check the structure has been correctly created, expand the database node and then the Tables node. You should see the list of tables as follows:
Dedicated Login
The Full Installation of Email Signature Manager requires a dedicated login using SQL Server Authentication and with db_owner role. This ensures that the service (which uses the same login as the main application) can connect to the database and that the database schema can be updated during upgrades of Email Signature Manager. The login can be created as follows:
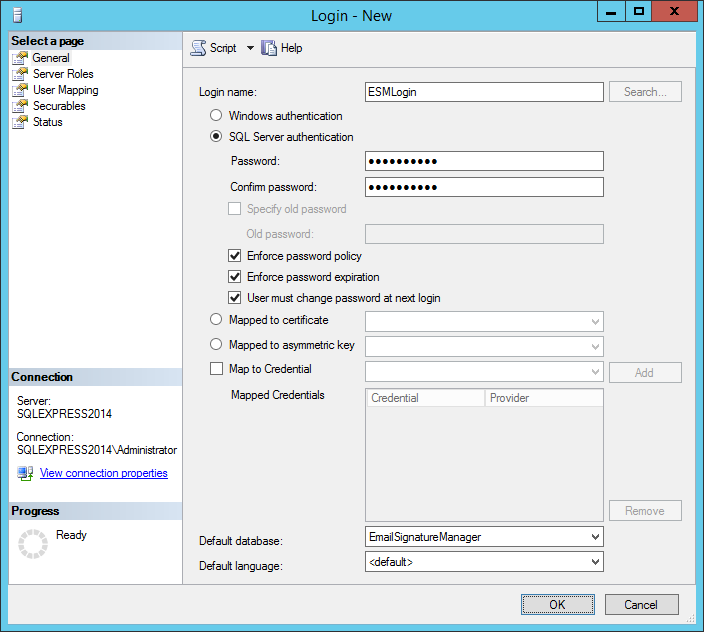
1.Start SQL Server Management Studio. Expand the Security node, right-click the Logins node and select New Login....
2.On the General page, enter a suitable name for the login. Select the SQL Server Authentication option and enter an appropriate password. Change the Default Database to the Email Signature Manager database. The configuration of the login should look similar to this:
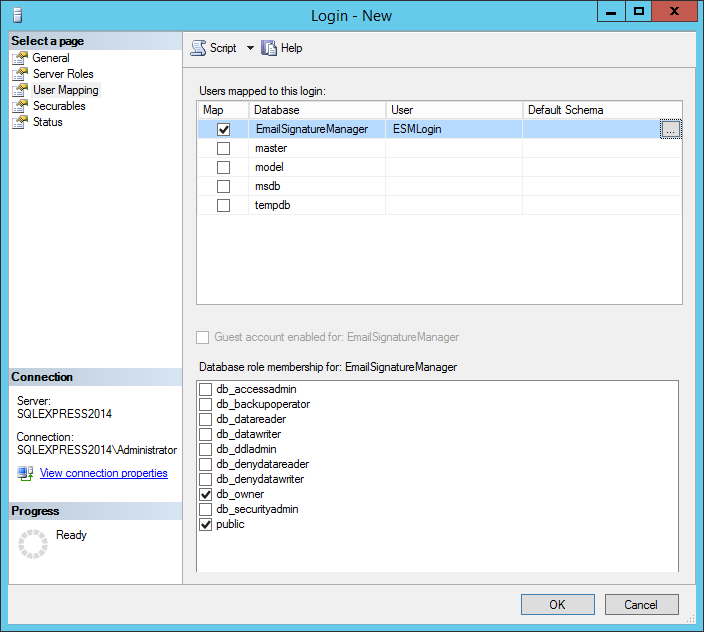
3.On the User Mapping page, check the Map column for the Email Signature Manager database and then check the db_owner role:
4.Click the OK button to save the login.
The login can be now be used in the Settings Database dialog to connect to the database.