When deploying signatures to Office 365, Email Signature Manager requires a service account assigned to the Application Impersonation role. This account can be created using the Office 365 administration portal as follows:
1.Log on to Office 365 as an administrative account.
2.Select Active Users in the USERS node of the tree on the left side of the page, and then click the add symbol ( ![]() ) on the Active Users list page to add a new user.
) on the Active Users list page to add a new user.
3.In the Create new user account popup, enter a suitable Display Name and User Name, configure the password according to your password policy, and ensure that the Make this person change their password the next time they sign in option is not checked. Here is an example:
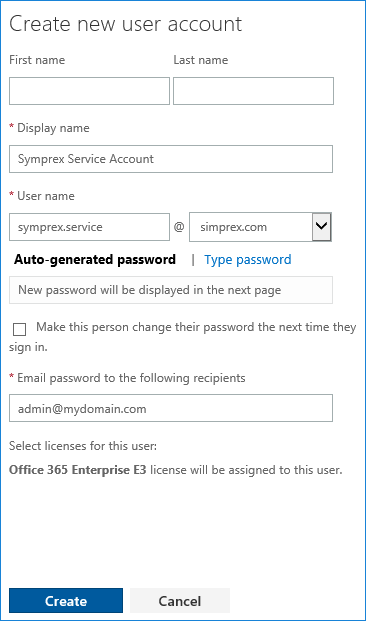
Click the Create button to create the account. If you have auto-generated the password, make a note of it.
4.Click Exchange in the ADMIN node of the tree on the left side of the page; this will open the Exchange admin center in a new window.
5.In the Exchange admin center, click permissions on the left side of the window.
6.Select the Application Impersonation role and click the edit symbol ( ![]() ).
).
7.In the Members list, click the add symbol ( ![]() ) and from the Select Members windows, add the account created in step 3 and click the OK button. The Members list should now contain the service account; for example:
) and from the Select Members windows, add the account created in step 3 and click the OK button. The Members list should now contain the service account; for example:

8.Click the Save button; the service account has now been assigned to the Application Impersonation role.