|
Campaigns are generally used to add news and marketing information to the end of the designated signatures; for example, to tell recipients of emails from your organization about a forthcoming promotion.
| • | To create a new campaign, click the Campaign button in the Create group of the Home ribbon on the main application window. |
| • | To edit an existing campaign, you can either: |
| o | Select the campaign in the template browser on the main application window and click the Edit button in the Template group of the Home ribbon, or |
| o | Double-click the campaign in the template browser, or |
| o | Right-click the campaign in the template browser and select Edit from the context menu. |
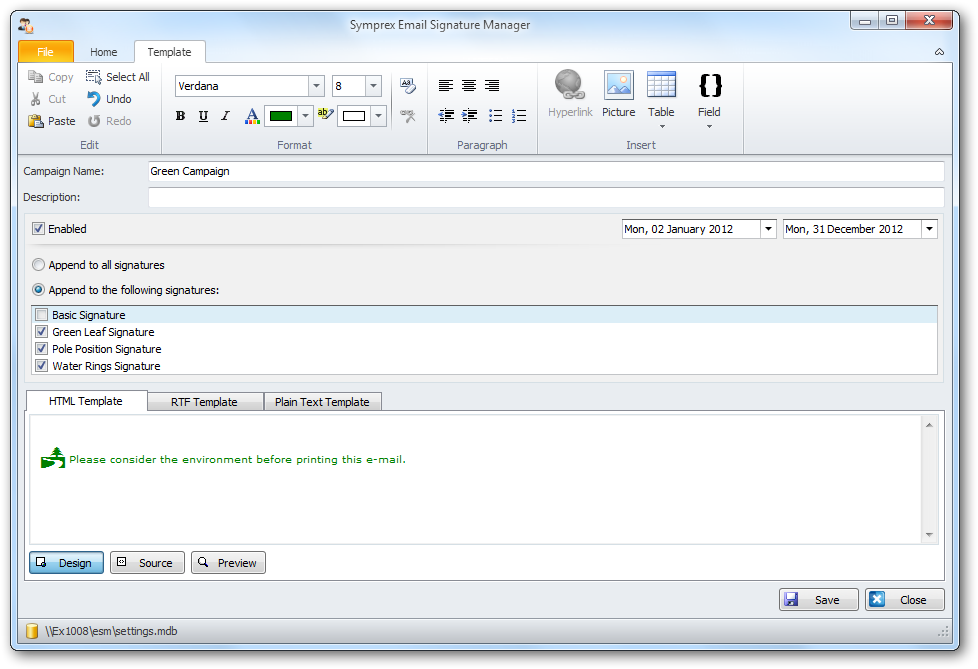
When you create or edit a campaign, the template editor will be opened:

Campaigns can have the following properties configured:
| • | Name (mandatory): The unique name of the campaign. |
| • | Description: A description of the campaign. |
| • | Enabled: Determines if the campaign is currently enabled. When enabled, the campaign is appended to the designated signatures. |
| • | Start Date: Optionally specifies the date from which the campaign will be appended to the designated signatures. |
| • | End Date: Optionally specifies the date until which the campaign will be appended to the designated signatures. |
| • | Append to all signatures: When selected, specifies that the campaign is appended to all signatures. |
| • | Append to the following signatures: When selected, the campaign is only appended to the signatures selected in the list. |
Note The fields in the campaign will be merged using the data source from the parent signature at the point of deployment.
| • | To save the changes and continue editing the campaign, click the Save button. |
| • | To close the editor and return to the template browser, click the Close button; you will be prompted to save if you have made any changes. |
|
