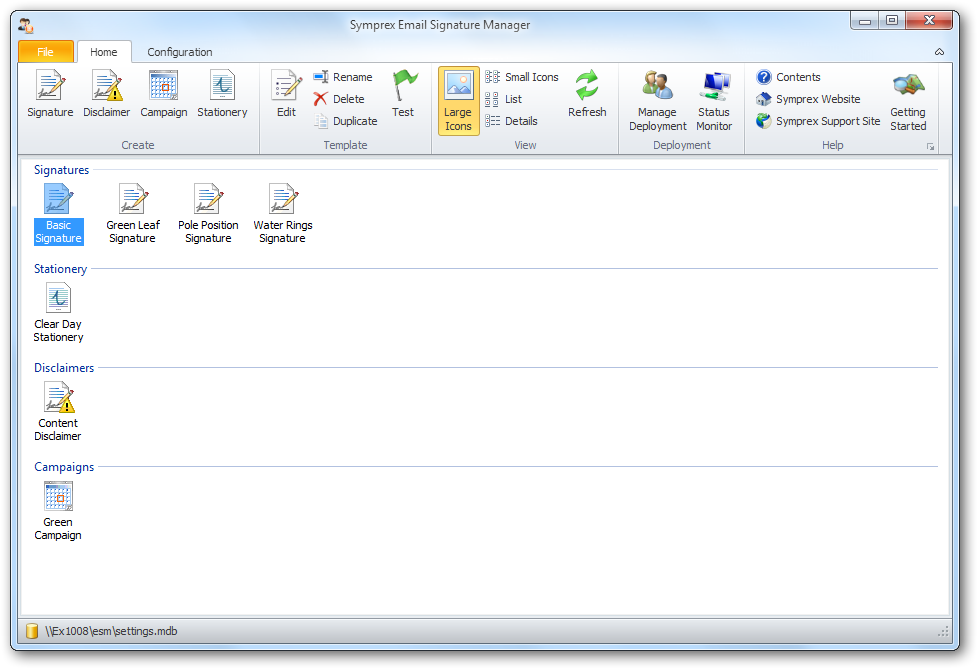
The main application window has several areas, as shown below:

The ribbon at the top of the window provides access to all of the functions in the application. The ribbon can be collapsed by clicking the arrow in the top right-corner to provide more space for the main content of the window. The buttons in the ribbon will be available according to the current selection in the main window. The settings database to which the application is connected is displayed in the status bar at the bottom of the window. Further details and options about the application can be found by clicking the File button, which will display the File page.
The main area of the window displays the template browser, which displays the templates defined in the database. The list can be viewed in one of four modes; click the appropriate button in the View group in the Home ribbon to change the view. To create a new template, click the appropriate button in the Create group in the Home ribbon. With an existing template selected, you can:
| • | Click the Edit button in the Template group in the ribbon to edit the selected template, or |
| • | Click the Rename button in the Template group in the ribbon to rename the selected template, or |
| • | Click the Delete button in the Template group in the ribbon to permanently delete the selected template, or |
| • | Click the Duplicate button in the Template group in the ribbon to create an identical duplicate the selected template. |
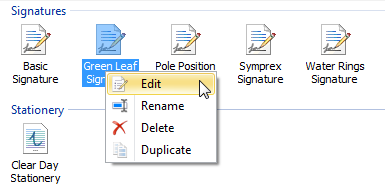
Note The commands are also available in the context menu, which is opened by right-clicking on the appropriate template as illustrated below:

Please see this topic for further information about creating and editing templates. Once you have created your templates, they can be tested by clicking the Test button in the Template group in the Home ribbon to open the Test Signatures dialog.
The deployment of your templates is managed using the tools in the Deployment group in the ribbon:
| • | The Manage Deployment button will open the Manage Deployment dialog, which is used to configure which users in your organization receive which signatures. |
| • | The Status Monitor button will open the Status Monitor dialog, which is used to monitor the deployment of signatures to the users in your organization. |
To change the overall configuration of the application, click the Configuration ribbon.

Note When a template is being modified, the Configuration ribbon is not available.
Within the Settings group are the following buttons:
| • | The Deployment Options button will open the Deployment Options dialog, which is used to configure system-wide settings for the deployment of signatures to your users. |
| • | The Office 365 Options button will open the Office 365 Options dialog, which is used to configure Office 365 signature deployment. |
| • | The Blackberry Options button will open the Blackberry Options dialog, which is used to configure Blackberry signature deployment. |
| • | The Configure Service button will open the Configure Service dialog, which is used to configure and manage the Email Signature Manager Deployment Service. |
Within the Mobile Devices group are the following buttons:
| • | The Transport Agent Rules button will open the Transport Agent Rules dialog, which is used to configure the rules applied by the Email Signature Manager Transport Agent when processing e-mails. |
Within the Settings Database group are the following buttons:
| • | The Settings Database button will open the Settings Database dialog, which is used to select the settings database to which the application is connected. |
| • | The Import Database button will open the Import Database dialog, which is used to import data from another database in to the current settings database. |
| • | The Load Connection Settings button is used to load the settings for connecting to a database from an existing configuration file; please see this topic for further information. |
| • | The Save Connection Settings button is used to save the settings for connecting to the current settings database to a configuration file; please see this topic for further information. |
Within the Tools group are the following buttons:
| • | The Define Data Sources button will open the Manage Data Sources dialog, which is used to configure the custom data sources used to provide data to your templates. |
| • | The Domain Configuration button will open the Domain Configuration dialog, which is used to configure how users and groups are found in your local domain. |