Signatures are installed to Outlook by the Email Signature Manager Agent. The Agent connects to the Email Signature Manager Client Access Service to fetch the user's signatures and settings, updates Outlook, and sends back the deployment results to the server; those results can then be viewed in the Status Monitor dialog. If the Agent cannot connect to the Client Access Service (for example, because the Agent is running off-domain), it reads the signatures and settings from the user's mailbox using Exchange Web Services (EWS). In this case, the Agent uses autodiscover to find the server hosting the user's mailbox, reads the signatures and settings written to the user's mailbox by the Email Signature Manager Service, updates Outlook, and writes the deployment log back the user's mailbox; the log is subsequently read by the Email Signature Manager Service and made available in the Status Monitor.
The interval at which the Agent checks for new signatures, and other Agent configuration, can be controlled through the Agent tab on the Deployment Options dialog.
Starting the Agent on an End User's Computer
There are three ways in which the Agent can be started on an end user's computer:
•Started at logon using a script.
•Installed via Group Policy.
•Installed via ClickOnce technology.
When the Agent is running an icon appears in the Windows system tray:
![]()
The Agent menu is available by right-clicking the Agent icon in the Windows system tray:
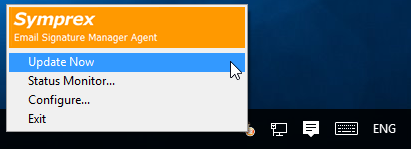
Using Update Now
In the Windows system tray, right-click the Agent icon and select Update Now to update Outlook signatures.
Opening Agent Status Monitor
In the Windows system tray, right-click the Agent icon and select Status Monitor... to open the Status Monitor dialog:
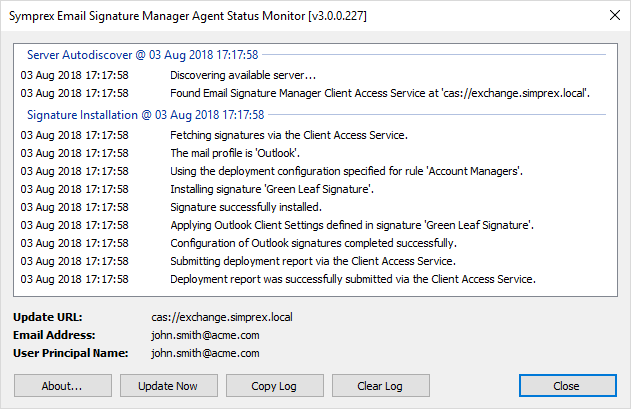
The main part of the window shows a list of the events that have occurred during the autodiscover and signature installation phases for each update cycle. Below the list, the Update URL (or database, if using a direct database connection), email address and User Principal Name that are being used for the update cycle are shown (see below for how the Agent determines these details). To start an update cycle, click the Update Now button and to copy log of events, click the Copy Log button. To copy a verbose log, hold down the Shift key whilst clicking the Copy Log button; this verbose log can be very useful for troubleshooting signature installation problems.
How the Agent Determines the Outlook Profile and Email Address
Before the Agent can fetch signatures and settings, it has to determine the Outlook profile to be updated and email address for which signatures are required. The Outlook profile is determined in the following order of precedence:
1.If a specific profile is selected in Agent Options, it is used (see Agent Options below); if the specific profile does not exist, an error is reported.
2.If there is only one Outlook profile, it is used.
3.If there are multiple profiles and the Always use this profile option is selected (in the Mail Control Panel applet), the specified profile is used.
4.If there are multiple profiles and the Prompt for a profile to be used option is selected, the profile that contains an Exchange account matching either the user’s primary SMTP email address (as defined on their domain account) or the specific email address specified in Agent Options, if any.
If the profile cannot be determined using this process, an error is reported and signatures will not be installed. The email address is determined in the following order of precedence:
1.If a specific email address is specified in Agent Options, it is used (see Agent Options below).
2.If available, the email address from first Exchange account on the selected Outlook profile is used.
3.If running using a direct database connection, the email address from the default send account on the selected Outlook profile is used.
If the email address cannot be determined using this process, an error is reported and signatures will not be installed.
How the Agent Determines Credentials for Exchange Web Services
If the Agent needs to read the signature settings written to the user's mailbox using Exchange Web Services, it will need suitable credentials. The credentials are determined in the following order:
1.Custom credentials entered by the user (see below for how to configure custom credentials).
2.Credentials stored by Outlook in Windows Credentials Manager.
3.User's current Windows logon credentials.
If the credentials do not allow a connection to be made, the user is prompted to enter custom credentials for establishing the connection.
Configuring Agent Options
In most situations, the Agent should determine the correct Outlook profile and email address for installing signatures, and should also be able to determine the correct credentials. However, in some cases, it may be necessary to manually configure the Agent. To accomplish this, in the Windows system tray, right-click the Agent icon and select Configure... to open the Options dialog:

To use a specific Outlook profile, select the Use the following mail profile option and then select the profile from the drop-down list.
To use custom credentials, select the Use the following custom credentials when communicating with the server option, and then enter the appropriate user name and password. If the Store these credentials in Windows Credentials Manager option is also selected, the credentials will be persisted to Windows Credentials Manager and will be used the next time the Agent is started; otherwise, the credentials will have to be entered again the next time it is started.
To configure advanced options, click the Configure Advanced Options button to open the Advanced Options dialog (see below).
When the settings have been configured as required, click the OK button save your changes and close the dialog. Alternatively, Cancel button to close the dialog without saving any changes.
Advanced Options
The Advanced Options dialog is opened from the main Options dialog:
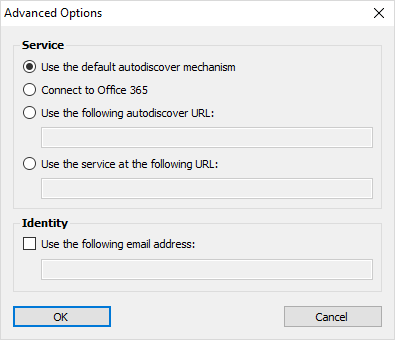
The Service group allows the service from which the signature settings will be acquired to be customised as follows:
•Select the Use the default autodiscover mechanism option to allow the Agent to automatically discover the service.
•To use a specific autodiscover service, select the Use the following autodiscover URL option and enter the URL (in the format https://<server>/Autodiscover/Autodiscover.xml).
•To use a service directly, select the Use the service at the following URL option and then enter as suitable URL as follows:
oTo connect to a Client Access Service, enter the URL in the format cas://<server>.
oTo connect direct to Exchange Web Services, enter the URL in the format https://<server>/ews/exchange.asmx.
To use a custom email address, select the Use the following email address option and enter the required email address.
When the settings have been configured as required, click the OK button save your changes and close the dialog. Alternatively, Cancel button to close the dialog without saving any changes.