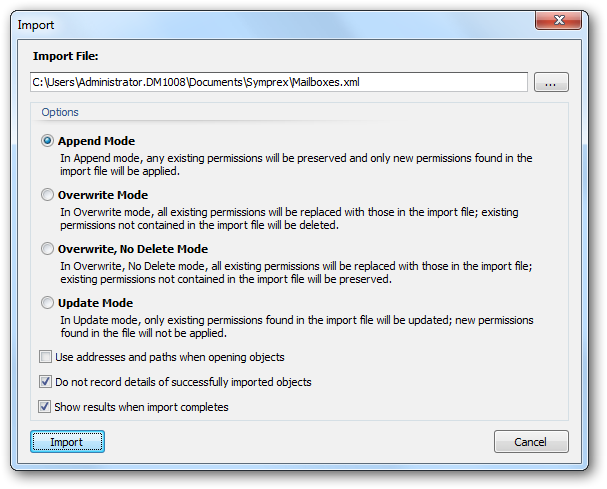
The Import dialog is opened by clicking the Import button in the Tools group in the main application window

The dialog can import any file previous exported using the Export dialog, either in XML or CSV format. Notice that the original object that was exported does not need to be selected to perform an import; the contents of the file will be examined and the appropriate objects updated according to the settings. You can configure the import as follows:
| • | Import File: Specifies the name of the file to be imported. |
| • | Import Options: Select the appropriate mode for importing the contents of the file. |
| • | Use address and paths when opening objects: By default, the import will be performed using the Entry IDs of the objects contained in the file. However, in some circumstances (such as migrating between Exchange Servers), the Entry IDs can change and hence, the import will fail. By selecting this object, mailboxes will be identified using their Active Directory address, and mailbox folders and Public Folders will be identified using their path. |
| • | Do not record details of successfully imported objects; For large files containing a lot of data, it can take a considerable amount of memory to store the results of importing all objects. In order to reduce the memory required, select this option; this will mean that only objects that were not imported successfully are retained in memory and consequently displayed in the Results dialog. |
| • | Show results when import completes: Specifies the Import Results dialog will be displayed on the import has completed. |
Note For details on how the various modes work, please review the Permissions Update Modes appendix.
When you are ready to continue, click the Import button; the dialog will expand to show progress and can be cancelled if required. Alternatively, click the Cancel button to close the dialog.