The Mobile Device Signatures dialog is opened by clicking the Mobile Device Signatures button on the Configuration page in the Configuration backstage of the main application window.
This dialog controls how the signatures are injected into emails sent from mobile devices as they are delivered through On-Premises Exchange Server.
Signature injection works by using a set of rules to identify where in an email the mobile device signature should be inserted. The text specified in the rule is replaced by the Mobile Device signature for the sender as specified in the Manage Deployment dialog, resulting in the signature being injected into the email. In addition, the Default Injection Rule can be enabled, which injects the signature at the end of the email authored by the sender when no other rules match. Signatures are injected into emails sent through Exchange Server using the Email Signature Manager Transport Agent.
To enable signature injection, on the Inject Signatures tab, select the Inject signatures into emails sent from mobile devices using rules option.
By default, most mobile devices send new emails in plain-text format. Selecting the Convert plain-text emails sent from mobile devices to HTML option will cause the plain-text emails to be converted into HTML format and and the HTML signature to be injected.
Note When a plain-text email is converted to HTML, the rules applicable to HTML format emails will be applied, not those applicable to only plain-text emails. Further, an email is only converted if a plain-text rule matches.
The Injection Rules are used to define how signatures are injected and the order in which they are evaluated:
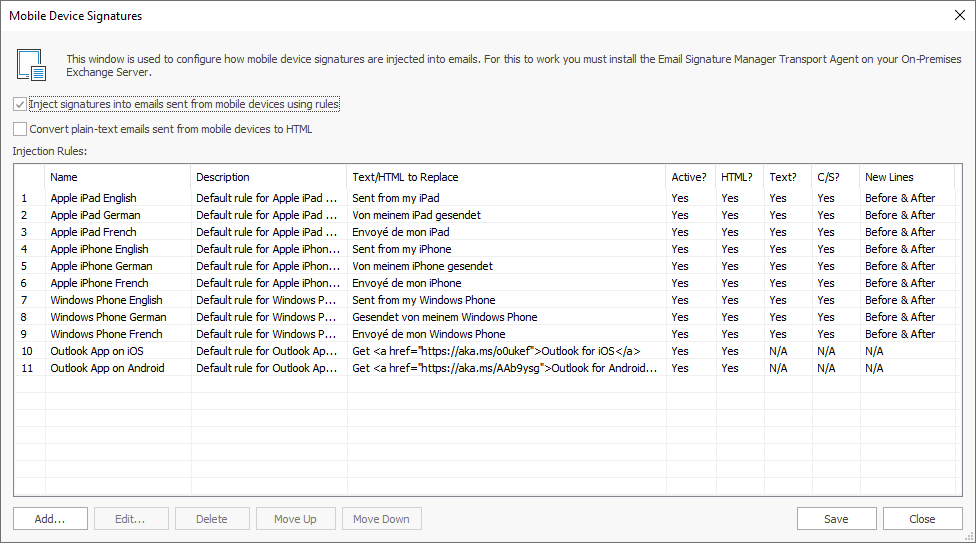
The following actions can be performed:
•To create a new rule, click the Add... button, which opens the Manage Signature Injection Rule dialog.
•To edit an existing rule, select it in the grid and click the Edit... button, which opens the Manage Signature Injection Rule dialog for normal rules or the Manage Default Signature Injection Rule dialog for the Default Injection Rule.
•To delete an existing rule, select it in the grid and click the Delete button; you will be prompted to confirm this action before the rule is deleted. The Default Injection Rule cannot be deleted.
•To move a rule higher in the list (so it is evaluated earlier), select it in the grid and click the Move Up button.
•To move a rule lower in the list (so it is evaluated later), select it in the grid and click the Move Down button.
When the configuration has been completed as required, click the Save button to save your changes. Click the Close button to close the dialog; if you have made any changes, you will be prompted to save before the dialog is closed.