The Test Signatures dialog is opened by clicking the Test button in the Templates group in the Home ribbon on the main application window:
This dialog allows you to test how your signatures will look when deployed to your users, and can also install the signature preview directly to Outlook and OWA.
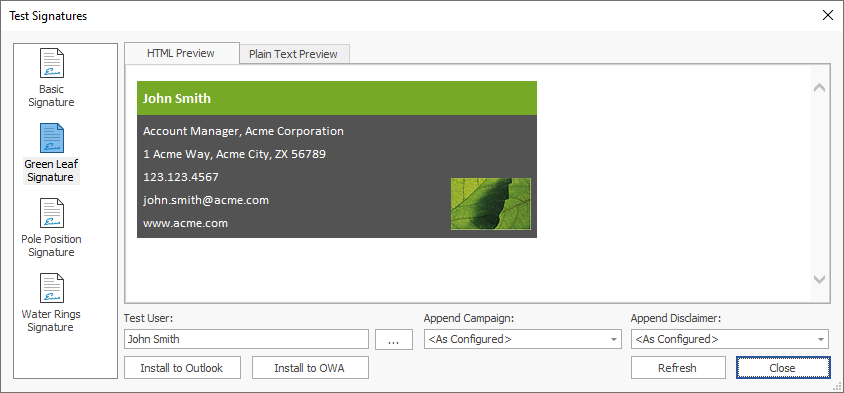
•To preview a signature, select it from the list on the left side of the dialog (the preview automatically updates when a new signature is selected).
•The preview will be populated using the data source defined for the signature; see creating and editing signatures for details on how to change the data source.
•The preview will be populated using the data for the selected user. Click the ellipses ("...") button next to Test User to select a different user from Active Directory, and then click the Refresh button to see how the signature will be generated for that user.
•Alternatively, you can enter the account name for a user in the Test User box and click the Refresh button; the specified user will be loaded from Active Directory and the signature preview generated. The user can be specified using either the plain account name (e.g. "john.smith"), the DOMAIN\Account format (e.g. "MYDOMAIN\john.smith") or the account@domain format (e.g. "[email protected]").
•By default, the configured campaign(s) will be appended to the signature preview (see creating and editing campaigns for further details). To see how a specific campaign will look, select it from the Append Campaign list and click the Refresh button.
•By default, the configured disclaimer(s) will be appended to the signature preview (see creating and editing disclaimers for further details). To see how a specific disclaimer will look, select it from the Append Disclaimer list and click the Refresh button.
The current preview (i.e. the exact contents of the previewed signature, as currently displayed in the dialog) can be installed to a number of the supported platforms for the currently logged on user to see how it will look.
•To install to Outlook, click the Install to Outlook button. You will be prompted to confirm this action before the preview is deployed to Outlook as the default signature for new and reply/forwarded emails. Any client settings defined in the signature will also be applied and the deployment will use the settings configured in the Deployment Options dialog.
•To install to OWA on the local domain, click the Install to OWA button. You will be prompted to confirm this action before the preview is deployed as the default OWA signature. The deployment will use the settings configured in the Environment Configuration dialog and the currently logged on user must have a discoverable mailbox for the deployment to succeed.
Note Closing the dialog will not undo any test deployment of the previewed signature.
Once testing has been completed, click the Close button to close the dialog.